Your roof protects your home from the elements, so it’s important to keep it in good condition. A few minor repairs are within the abilities of most homeowners, but major repair jobs should be left to professional roofers. Round Rock Roofer start by visually inspecting the exterior of the house, gutters, roof edges, and flashing around chimneys and dormers. They look for shingle damage, water stains and other signs of leaks.
Inspecting the Roof
A professional roof repair company will start with a visual inspection. They will look for things like curled shingles, crooked gutters and other signs of trouble from the ground. They will also check the structural integrity of the roof planes, soffit and fascia. Masonry chimneys are also inspected for cracks and other problems. The inspector will also check the ventilation in the attic to ensure that it is adequate. Proper venting is essential to extend the life of your roof and prevent mold and condensation inside the house.
They will also inspect the flashing, which are strips of metal or other material that divert water around penetrations in the roof, such as vent pipes, chimneys and roof windows. Building codes require that flashing be installed correctly, and a professional will be able to spot problems with the installation immediately.
If the inspector can get into your attic or crawlspace, he will look for signs of water infiltration. Damp stains, black marks or mold are all red flags that indicate a leaky roof. If the inspector can’t access the attic, he will use chalk to mark where the water is coming in so that you can find the problem areas later on.
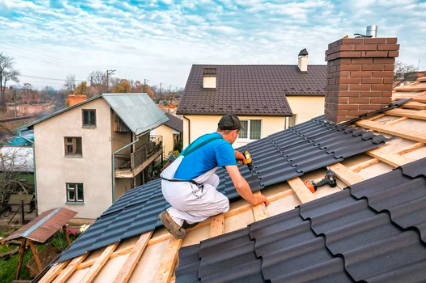
Then they will go up on the roof, using ladders or a safe climbing device, and examine it closely. They will look for damaged or missing shingles, as well as shingle flashing that is loose or improperly installed. They will also look for moss growth and other signs of deterioration, such as the bending of metal flashings.
Once they have found the problem area, they will remove any shingles that are still intact and install the underlayment materials that will protect the structure from moisture. They will then replace the damaged shingles, and fasten them to the decking with the proper number of nails and in the correct pattern.
The roof should be inspected regularly, and especially after heavy rains. The attic should be inspected regularly too, and the flashings around penetrations should be checked for rust or holes. If the flashings are in poor condition, they will allow rainwater to seep into the attic, causing mold, wet rot or other damage to wood at lower levels.
Removing the Damaged Shingles
When you know that you have a damaged shingle, you should remove it and replace it with a new one. This will help to protect the underlayment, prevent further damage to the roof and reduce the risk of leaks.
You should start by gathering your materials, including a flat pry bar, asphalt roofing cement and replacement shingles. It is also a good idea to have a sturdy ladder available for climbing the roof and safety equipment to help keep you secure. If you don’t have a ladder, consider renting one from a local hardware store or hiring a professional roofing contractor.
Once you’re on the roof, spread a large tarp beneath the section where you’ll be working, and begin pulling up the old shingles. Work in a 2- to 3-foot section at a time, then throw the old shingles away into a dumpster when you’re done. Be sure to cover any walls or gardens nearby to protect them from scuff marks or debris, and take special care around skylights and chimney flashings. You may want to try and reuse the flashings if they’re in good condition, but if not, you should remove them and replace them with new ones that match the color of your existing shingles.
Next, find the shingle that is damaged and begin loosening it with the flat pry bar. This will break the sealant bond and expose the nails underneath. It is best to do this in cool weather, as the adhesive is more easily sheared with a pry bar when it’s cold. Continue to loosen and remove the shingles in the first row above the target shingle, and then move on to the second row to further separate and reveal the nails and adhesive below.
Once the shingle is loose, you can now use the flat pry bar to remove its nails and pull it free. Be careful not to tear the surrounding shingles when you do this; it’s possible that the nails holding the damaged shingle are also penetrating into those above it. If you’re concerned about this, you can always remove the other shingles later and put in new ones that are a slightly different color to camouflage the patchwork effect.
Installing the New Shingles
Before starting the shingle installation, clear the work area. Remove plant debris, tripping hazards, and any items that could become projectiles during the repair process. Also, spread sturdy tarps or blankets over any delicate plants near the house to protect them from dropped tools and debris.
Once the work area is clear, begin by laying out a course of starter shingles along the bottom edge of the roofline. Nail them down using roofing nails. Be sure to leave about an inch of space between each shingle and the drip edge of the underlying roof.
As you work, remove any shingles that are damaged or brittle. You will probably need to replace them later, especially if they are exposed in the areas where you are installing the new shingles. Also, take the time to inspect your flashing around your chimney, skylights, vents, and the siding to make sure that it is still in good condition. If it is, you may be able to reuse it.
Begin laying out the new shingle courses in a pattern that begins at the lowest edge of the roof and extends to the ridge. As you do this, use the previous row as a guide for alignment and nailing. Work up to the ridge, where you will need to bend each shingle over the last one installed at the eave or rake. When you reach the ridge, cut the last shingle to the preferred length that you need, but be sure that no part of the roof is exposed.
Then, install a new flashing of asphalt-impregnated felt paper or a self-adhering ice and water shield at the high points on the eave and rake where it meets the shingle course. This is an important step and should not be skipped. A single mistake here could allow water to seep into your home.
If you are replacing a roof that has metal panels, it is a good idea to consult with a professional. These are a bit trickier to work with than shingles and need to be properly installed or you will have leaks in the future.
Sealing the Roof
One of the most important parts of a roof repair project is sealing the roof, which protects the repaired area from moisture damage and other hazards. It can also increase a home’s energy efficiency and add to its curb appeal. However, this is not a job that should be taken lightly, as it involves working at dangerous heights. For most homeowners, hiring a professional to handle the task is the best course of action.
Before applying any type of sealant, a thorough inspection must be performed to ensure that the damaged areas are structurally sound. If not, covering them up with a sealant will do more harm than good in the long run. For this reason, all repairs should be completed prior to sealing the roof.
There are many different types of roof sealants available on the market. Some are water-based while others are solvent-based and more durable. Some are designed to be mold-resistant, while others offer UV protection and reflectivity. It is a good idea to read reviews and compare products before making a decision.
The best type of roof sealant is silicone, which is highly effective in combating moisture build-up and harmful UV rays. This type of roof coating is usually more expensive than other options, but it will last longer and protect the structure of your home. It is recommended to apply a silicone roof coat every five years. However, if your roof has a flat design, you may want to consider applying the seal coat every three or four years instead.
Before you begin applying the sealant, make sure the roof is clean and free of any debris or algae. These things can prevent the sealant and paint from adhering properly, resulting in a poorly done job. You should also clear away any moss growth on the roof before you start work.
The cost of roof sealant varies depending on the product, size of your home’s roof, and the amount of material needed to fully cover it. It is typically priced between $0.20 and $0.80 per square foot.