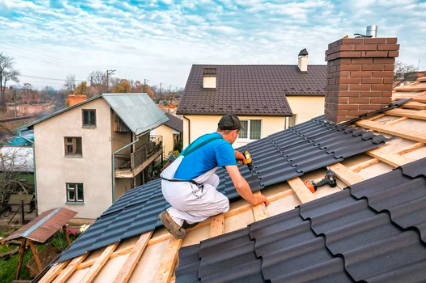
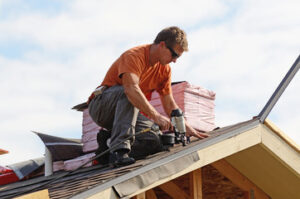
A Roofing Company is a business that repairs, replaces and installs roofs for homeowners. Often, these companies also offer window repair and replacement services.
When hiring a roofing company, make sure to look for one that has good reviews online and is licensed in your area. Insurance is also a must-have for this type of business.
A business name is the first impression a potential customer will get of your company. It needs to be catchy, memorable, and set you apart from your competitors. You should also consider your customers’ expectations and how your business will help them.
A good name tells your customers exactly what you do and how you can meet their needs. It’s important to choose a name that is easy to pronounce and spell, so it’s more likely people will remember it. It’s also a good idea to keep it short and descriptive.
Choosing a business name is an important step in the process of starting your own roofing company. It can make or break your business’s reputation and may affect your business’s marketing strategies. It’s a good idea to brainstorm different options and to think outside the box when coming up with ideas. Once you’ve narrowed down your choices, make sure to check availability online and in local databases. Some states require companies to register a “Doing Business As” or “Assumed Name” with the secretary of state’s office, so be sure your chosen name is available.
It’s also a good idea to avoid using any names that sound too similar to other roofing companies, as this will confuse customers and make it harder for them to find you in search results. Alternatively, you could use your own name for the company, but this isn’t always a great option unless it’s well-known in the roofing industry. Using a made-up name may be a good choice for some businesses, such as technology or start-ups, but it’s important to make sure it communicates the essence of your company.
When selecting a name, you should also consider how it will look on your website and other marketing materials. It’s a good idea to test it out on potential clients, as this will give you an indication of how well it will resonate with them. You should also keep in mind that it can be a challenge to change your business name later on, so you’ll want to make sure your chosen name is brandable before finalizing the decision.
Choosing a Logo
Choosing the right logo for your roofing company is essential to creating an effective brand. It is a way to convey professionalism and reliability and can make your roofing business stand out from the competition. A well-designed logo includes a unique color palette, fonts, and images that represent your roofing services. The design should also be simple and recognizable across all types of media.
Your roofing company logo should include your company name, preferably in a bold, easy-to-read font. Avoid fancy fonts that can be difficult to read, especially for your middle-aged or elderly customers. A good roofing logo is versatile enough to be used in any size and on various types of medium, from a small business card to a large billboard. It should also look great in black and white or on a dark background.
You can find many templates online for logo designs, but be careful not to copy someone else’s design. This could look cheesy and can hurt your credibility. It’s better to use these as a starting point and then create something unique for your roofing company.
A logo shows the world what you stand for, makes people remember your brand, and helps potential customers understand if your product is right for them. It communicates all of that through color, shape and other design elements. There are several free, online color palette generators that you can use to help you come up with a color scheme that complements your image and tells your brand story.
When designing a logo for a roofing company, it’s important to keep in mind that your customer base will be both homeowners and roofers. A roofing company logo that’s too flashy or childish will be a turnoff for both groups. The best way to avoid this is by using a color scheme that evokes professionalism. You can also incorporate an image that represents your roofing service, such as a roofer wearing a hard hat.
When it comes to choosing a font for your roofing company logo, there are millions of possibilities. However, most roofers choose to stick with a solid block-style font that’s easy for both customers and contractors to read. If you’re looking for something a little more stylish, there are lots of decorative typefaces available that have a bit more flair but still remain legible.
Choosing a Website
Roofing companies can grow their business with a well-designed website. The website should feature all the services they offer, including roof inspections and de-icing services. It should also include the quality products they use. In addition, it should be updated regularly. For example, it should be updated to reflect the needs of property owners during different seasons.
A roofing website should be designed using a minimalistic style, with the key information presented in an easy-to-read manner. It should include a call to action and a contact form, which can be used to request a roof estimate. The website should also be compatible with mobile devices. This is important because the majority of searches for a roofing company are done on mobile devices.
If you are looking for a web designer to create your roofing website, be sure to ask them to provide examples of their previous work. You can visit their sites and get a feel for their style. Also, ask them to explain how they will improve your site’s design and functionality. A good web designer will be able to answer these questions with confidence and enthusiasm.
The website of some Roofing Services uses a clean and streamlined design, with little text and bold visuals. The homepage includes a Google map that shows the numerous locations of the company’s projects. This is a powerful way to convey the company’s extensive experience to potential customers. The homepage also displays a headline that highlights the fact that the company has replaced over 8,000 roofs. This is an effective use of visuals and minimal text to make a big impact.
This roofing company website features a sleek and streamlined design with plenty of white space and a clean, simple color scheme. The header and body text are a pleasant combination of gentle lavender and dark purple, with bold, dark font that emphasizes core values. The site’s design is complemented by a photo of the company’s employees, which adds to its credibility as a family-owned and operated business.
Choosing a Business Description
A business description is the best way to let potential customers know what you do. You can also use it to promote special offers and discounts. This will help you attract more customers and increase your revenue. Moreover, it will make your website look professional and trustworthy. In addition, it is important to make sure that your website has a secure SSL certificate. This will prevent hackers from accessing customer information and financial data.
As a small business owner, you wear many hats. One of these is that of chief brand officer. This means that you are responsible for creating a brand that will set you apart from your competition. It is vital that your brand reflects the type of roofing services you offer and makes people trust you with their homes. In order to do this, you should choose a name that communicates your company’s philosophy or motto. You can also create a tagline that will make it easier for consumers to find you online.
Having a good online presence is essential for any roofing business. This includes having a quality website, Google Business Profile, and social media accounts. It is also important to have a mobile-friendly site. This is because more than 60 percent of searches are conducted on mobile devices. In addition, having a Google Business Profile is critical because it helps local businesses rank higher in search results.
Your Google Business Profile should include high-quality photos of your work and a well-written business description that is free of sales pitches. You should also add keywords that are relevant to your business and the consumers you want to target. This will help your business show up in the top three search results and get chosen more often.
In addition to having a website, you should consider using local directories and listings to increase your business’s visibility. These directories will allow you to share your business’s contact information, working hours, and categories with potential customers. In addition, they will help you establish your roofing business’s credibility and authority in the local market.